Team Mixing Light is thrilled to have the multi-talented Scott Simmons guest post here on our blog. Scott is an editor, blogger and managing editor of Pro Video Coalition. His channel on PVC is a must read. Recently, Scott and I were talking and he mentioned how it would be cool to do a blog post about the editor/colorist relationship and talk about communication for a smooth hand off from editorial to color. After talking some more, we decided to pursue the idea but have two perspectives. So what we decided to do is cross-publish our posts and thoughts on the subject on our two sites.
Here on Mixing Light and in the post below, Scott is sharing with us an editors perspective. In this post, Scott is giving advice to editors about how to prep for a color session and the importance of good communication in the editor/colorist relationship. Over at Pro Video Coalition, you’ll find my guest blog post where I talk about this same subject – but from a colorists perspective. Enjoy!
-Robbie
Prepare Your Timeline: Color Correction Prep & Communication
If you’re currently working in the world of film and video postproduction then you’re working at a time when there are more quality color-correction and color-grading tools than ever before. There was a time when color-correction was only the realm of a dedicated colorist in a ultra-expensive color suite. The power of color came to the masses first with the 3-Way Color Correction in Final Cut Pro 7 but now we have very powerful and very affordable tools ranging from DaVinci Resolve Lite, to Adobe SpeedGrade to Magic Bullet Colorista.
While all those tools are well and good it’s the eyes making those color decisions that is the most important part of the color grading process. I’ll be the first to admit that a dedicated colorist can do a much better job with color that I can.
Interfacing with a colorist is something that many young editors today don’t ever have to do. Editors shouldn’t ever be offended if a producer or director wants to send a job out to a good colorist as they will often bring something to the job that is hard for an editor to match. If you’re an editor who has never had to send a job out to color and have never interacted with a colorist then read on for some tips on how to make the process go a lot smoother.
Then check out the companion article from our friends at Mixing Light as they approach this topic from a colorists point of view. Smoother often means faster and faster often can mean money saved. That’ll make a producer and director happy.
Talk, talk.
First and foremost I think editors want and need a good line of communication with a colorist. All matter of problems and issues, be they technical or logistical, can be solved by good communication. We’re all busy and what are seemingly simple conversations can often turn into a 30 or 45 minute blocks of phone time (have you ever really thought about how much time out of a work day a couple of phone calls can take?) but if you can keep the call to a few minutes, or the email to a few lines, time can be saved in the color grading process. But if you must engage in a 30 minute phone conversation with a colorist remember that might save a couple of hours down the road.
In the bigger picture of what questions need to be asked before moving an edit to color grading by a professional colorist, I would often ask the colorist a few simple questions. It should be noted that what seems like a simple question might turn into a detailed discussion as often things in post-production aren’t as simple as they might seem. Here are those questions:
To conform or not to conform?
Doing a color grading session means the edit has to be in the colorist’s box. That means either conforming an edit (using the original source media) or exporting some type of flattened, self-contained file for the colorist to use. This is an important, early conversation to have with the colorist as it might make a difference in how you approach the edit and your timeline.
Different types of grading systems have their own unique workflows and some might work better than others. It’s important for the colorist to first let the editor know what kind of workflow they’d prefer given the time and budget. It’s then up to the editor know what types of media they have been working with and have a discussion with the colorist if there are “abnormal” things like weird frame rates, mixed resolutions and speed effects (especially ramp speed changes created by the editor in the NLE).

Don’t ever assume that just because you can do it in the NLE that it can be done in the color grading suite. Let me repeat that: Don’t ever assume that just because you can do it in the NLE that it can be done in the color grading suite. That assumption has cost many a color session extra time and money and many a colorist an extreme headache.
All of those third party plugins you have at your disposal in the NLE won’t magically appear in the colorists system. If you do use a lot of effects then discuss with the colorist how they want those delivered. You may end up exporting new, self-contained versions of the effects heavy shots and laying them back into the timeline. On a big show that could be a lot of work but such is the price you might have to pay for lots of crazy effects. That said, the colorist might think it best to grade the shot without the effects. That could mean some rebuilding of the effects after the color session. Such is the price you might have to pay for lots of crazy effects.
EDL, AAF, XML?
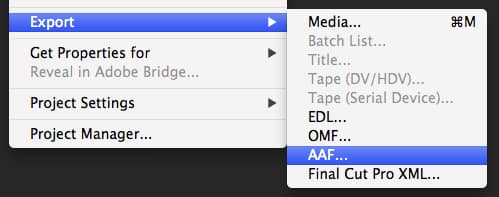
If you are conforming then you’ll need to provide the colorist with some kind of list that imports into the colorist’s system. Depending on the type of edit and type of system that could be an AAF from Avid Media Composer, an XML from one of the Final Cut Pros or just a good old EDL. Why use an EDL in the modern world of more advanced lists? If your project is set up right then an EDL is one of those universal formats that most anything will read.
When it comes to conforming, the editor needs to talk to the colorist to get an idea of what they prefer. There might be advantages to providing a flattened Quicktime if you’re working with lots of different formats, especially if some of those don’t have timecode.

If you’re cutting on Avid Media Composer then some grading systems have very good workflows where the editor can supply Avid DNxHD media consolidated out of the timeline along with an AAF. The colorist can then render new, graded DNxHD media as well as a modified AAF that the editor imports back into his or her Avid. That modified AAF will relink to the new, graded media.
I’ve used this workflow many times with a Baselight and it works very well. This is an especially good workflow if you’ve used a lot of Avid Media Composer effects as those effects are reapplied to the new media and not baked in. The same is true for a Final Cut Pro 7 XML (though most of my experience doing this has been with Media Composer).
I can only assume that as Adobe Premiere Pro and Final Cut Pro X progress they will easily interface with grading systems as well. DaVinci Resolve already supports FCPX’s new type of XML so this type of workflow isn’t exclusive to Baselight and Media Composer – it’s just the workflow I’m most familiar with. And this is yet another important topic of conversation with the colorist.
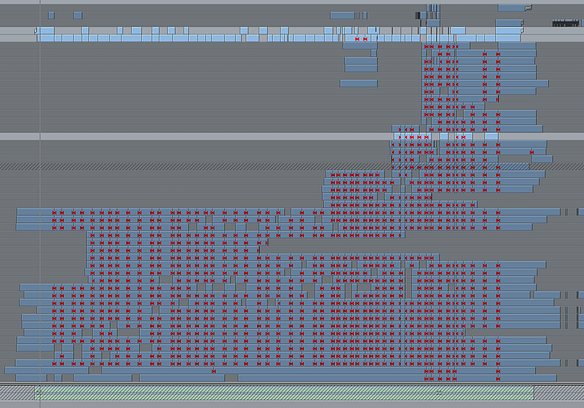
If you are providing a conform list to the colorist then it’s not only courteous to provide a neat and tidy timeline but also a necessity since some 40 layer deep music video where the editor has stacked up performances and disabled clips they aren’t using just might cause the grading system to choke and just might cause the colorist to choke the editor.


I don’t see anything wrong with a colorist picking up the phone and calling out an editor when they provide such a messy timeline that it’s near impossible for the colorist to make heads or tails out of it. “Calling out” is probably the wrong term but an editor needs to know when they’ve sent over such a mess it is nearly impossible to conform. It’s not the colorists fault that they can’t decipher a cryptic timeline just from an XML nor should they be expected to.
Beyond the messy timeline from a sloppy editor there are certain items that an editor often includes in an edit that the colorist doesn’t need and doesn’t want to deal with. Graphics and lower thirds are rarely needed in a color session and can only cause “clutter” in the list when trying to conform. Things like film burns, grunge effects and dust particles might not be desirable when grading either. This is a place where that conversation with the colorist is important. If you’ve left all that stuff in a timeline expect a call from the colorist to sort it out.
We are not conforming. What type of file is best?
If you know you’re not going to be conforming from camera source media then talk to the colorist about what type of file they would like for the grading session. I think the most standard type of file these days is a self-contained QuickTime. But remember the sandwich analogy when it comes to supplying a QuickTime file and talk to your colorist to determine what codec to use.
There was a day when an uncompressed QT was a norm, but that could make for some huge files. Today ProRes feels like the norm but ProRes 4444 is overkill for DSLR originated material. A quick conversation with your colorist might even result in a file that could be FTP’d or Dropbox’d, eliminating the need to physically transport a drive.
While not a true conform, in the sense of going back to all original camera media, a consolidated sequence out of Avid Media Composer or a media managed FCP7 project can provide the colorist with a timeline that contains all of the edits with handles. Then the provided AAF or XML makes for a (usually) easy, one click conform. This can also be achieved without recompressing the media – depending on the format shot. This is a place where that discussion with the colorist can determine of this type of workflow is ideal. Having that conversation before the edit begins might pay off at the end of the cut when it’s time to grade.
Why do you need an EDL if we’re not conforming?
And about that EDL … while primitive in carrying conform data the EDL can still be very useful to a colorist if you’re supplying a flat, self-contained QuickTime file. That EDL can provide data on all the cut points in a program that allows the colorist to “slice up” the QuickTime file. This is vitally important since grades change from shot to shot. Yes many modern color grading systems can auto-detect scene changes to slice up a file (often very quickly) but I have yet to meet a colorist who didn’t appreciate an EDL. Yet another reason to communicate with the colorist.
And supplying that EDL means the editor needs to keep a tidy timeline as an EDL is only one video layer. Unless you’re doing some effects then one video layer is ultimately all you really need in a timeline. It might take you the editor some time to collapse a sloppy timeline but doing so to provide an EDL could save your project money in the color grading session if you’re being charged hourly.

If you are providing a flat QT and you do have a lot of transitions, picture-in-pictures or superimpose effects then discuss with your colorist exactly how to handle that as grading two very different shots through a long transition might not work very well. Ultimately you may have to provide those elements separately and reassemble them after the grade.
The universal supply “kit”
If there was ever an instance where an editor could not speak with the colorist or color house before sending a job over for grading then there is a “kit” of material that I would supply that should allow most any color grading house to perform the grade. While it’s very rare the editor would never be able to talk to the colorist it has happened and I’ve supplied this “kit” of materials without any issues. It’s quite a few items and probably more that can be sent via Dropbox or FTP but if it’s a long program then you’ll most likely be shipping a hard drive.
Begin with a final picture locked sequence in the NLE that is a single layer of video with a single piece of mixed down or exported audio (not the multiple layers of audio from the edit). I always include a countdown with a 2-pop just in case the colorist has to use a separate piece of audio provided. Make the first frame of the program start at the one hour (1:00:00:00) mark in this final sequence.
If you include 10 seconds of slate or countdown then your sequence start time would be 00:59:50:00. Include a bit of black at the end. From that sequence I would create the items listed below. It’s quite a lot of material but when in doubt supply more rather than less. You don’t want it to be the editor’s fault that a show can’t be graded and misses a deadline.
- A consolidated or media-managed NLE project or sequence of the final picture locked edit with a single layer of video and 10 frame handles. This would be a Final Cut Pro (or Premiere Pro) project file or Avid Media Composer bin with only a single sequence so as not to cause confusion which sequence to use if the NLE project has to be opened. You can use this single sequence to generate the editing lists below.
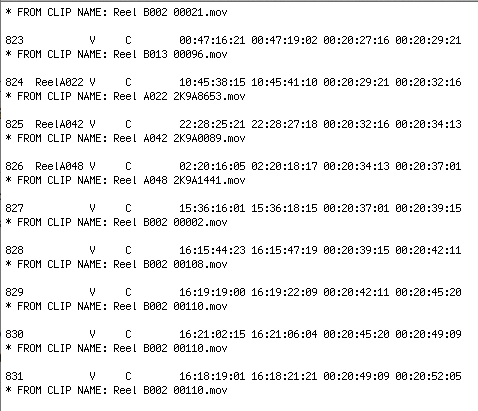
- An editing list from that NLE’s picture locked timeline. That could be an AAF from Media Composer or an XML from Final Cut Pro or both from Adobe Premiere. And always include a basic CMX3600 EDL. You can turn off a lot of the EDL options as well. Open that generated EDL in a text editor just to make sure all the cuts are there. These lists will reference that media with 10 frame hands that the editor will include on the drive. You can always import that list back into a new NLE project just to test that it works and references the consolidated media. Better still test it after moving it to the shuttle drive to guarantee it’s linking to the right media.
- An H.264 reference file that includes burn-in-timecode (BITC) of the picture locked sequence master timecode. When in doubt include both a small quarter screen size and a full resolution size.

- A clean, flattened, self-contained Quicktime file of that picture locked sequence that can be used for grading. Most grading systems can use a ProRes .mov but a DNxHD could be acceptable as well but I’ve found the ProRes as being more universally acceptable. Know your ProRes flavors as exporting DSLR media as a ProRes 4444 is overkill and wastes time and space. When in doubt then no one has ever been fired for supplying a ProRes HQ. Clean means no burn-in, no lower-thirds or graphics.
- Both a 48K AIFF and WAV file of the audio from the picture locked sequence that includes the 2-pop. Yes the audio can usually be used or extracted from the flat Quicktime or the BITC reference but including these audio files ensure that if all else fails there is some time of audio reference that can be loaded into the grading system.
- A note from the editor included in all of this material with name, contact information (including cell phone) and some notes on the job can mean a lot of something goes wrong. Instructions of what to do with the graded program or who to call when the grade is done is important as well.
While this list might seem like a lot of materials to supply just for a color grading session this range of media means that most likely any colorist can load up the job and go to work. It really won’t take an editor that long to gather that much from an edit and you can alway save export templates for some of the renders.
I’ve found the most time consuming to be the H.264 exports but you can always export the self-contained ProRes that the colorist can grade first and then use an encoding application to make the H.264s with their supplied filters that will read the file’s timecode to create the BITC.
If you ever do have to send these materials over to a colorist without some type of communication first I would expect an email or phone call from the color house back to the editor to let the editor know that everything arrived, loading the job worked and the color session is ready to go; that’s common courtesy.
What about delivery of the graded project?
Once the grade is completed the colorist needs to know what to do with the finished file. I think it’s the editor’s responsibility to let the colorist know that even if that is to simply tell the colorist to talk to the producer. No colorist wants to chase down a producer, director or editor when the job is done just to know what do to with the file. It might be as simple as making sure the producer conveys that info to the colorist but often the editor is the one getting the graded program back for the final finishing. Or the graded files may be going to a finishing box like Autodesk Smoke or Flame. The color session isn’t usually the last stop since audio often needs to be layed back to final picture. Often graphics, titles and lower thirds need to be added as the colorist more than likely doesn’t want to have to grade your lower thirds and titles.
Once the final finishing has taken place (audio is mixed, graphics are done, beauty work and effects have been applied) there’s often different deliverables that have to be created and that can mean any number of files that are ultimately delivered to the client. Unless the colorist knows this is their responsibility (and they have agreed to this extra bit of what can be a lot of work) it can’t be assumed that they will make all the different deliverables, even if there isn’t a lot of final finishing to do after the color grade.
Slate and copyright
This might seem trivial but I’ve seen it pop-up more than once and cause a delay in the final delivery of a job. Who is inserting the slate and copyright on the final output if that is needed? That answer is easy if the color grade goes back to editorial for some “online” final finishing but if grading is the last stop and the program has no copyright then it might need one.
Most color grading systems have the ability to generate some type of slate and copyright though some colorists might not want to do it. On rare occasions I’ve seen slating described as beyond the scope of what the colorist does. Often there is an assistant that can generate a slate and copyright if they are provided with exactly what each needs to say. There’s nothing more frustrating than trying to chase down slate info at the end of a session. Yet another place where that early bit of communication can save time and frustration in the end.
Can I hang out in the grading session with you all day?
Most editors have to do some of their own color work from time to time. If you enjoy that part of the post-production process then it can be fascinating for an editor to hang out in a grading suite with a great colorist twirling the knobs on an expensive grading panel. That inevitably leads to questions which most colorists are happy to answer. But that type of thing slows down a grading session.
If you are fine paying by the hour then most colorists probably won’t mind if an editor sits in all day but if it’s a flat rate then it might be a problem. I always encourage editors to be courteous to colorists and ask if it’s okay if the editor comes by for part of the grading session. They are usually fine with it so try and get an idea of when the best time is to visit and don’t overstay your welcome.
Producers or directors on the other hand might not want anyone in the grading suite that could slow the process so they must be taken into consideration as well. Editors always want some time during the creative part of an edit to cut without someone looking over your shoulder and asking a bunch of questions. Colorists want the same thing.
Now that you’re at the bottom of the editor’s workflow article, click over and read the colorists take on this important topic from Robbie Carman at Pro Video Coalition.
————–
About Scott Simmons –
Scott Simmons is a freelance editor living in Nashville, Tennessee (www.scottsimmons.tv). Over his decade long career he has worked both on staff at a post-production house as well as freelancing. Scott has worked on diverse projects from music videos to commercial spots to television programs to many different kinds of corporate communications. He is the creator of The Editblog,one of the first blogs dedicated to editing and post-production, and is managing editor of Pro Video Coalition where the Editblog is currently published. You may also find him teaching about post-production at NAB, the Southeast Creative Summit or some of the local film schools around Nashville.
About Pro Video Coalition –
ProVideo Coalition is a leading resource for video professionals, including studios and independent filmmakers. This award-winning site provides comprehensive information on production and post-production in a multi-distribution environment: film, online, mobile, and broadcast. PVC advances careers and technologies by connecting world-class professionals with each other and with their audience. Connect with the Experts by visiting www.provideocoalition.com


