| Series |
|---|
Day 2: 25 Insights in 25 Days Holiday Marathon
The Premiere Pro CC Desert Island Challenge: Part 2
Would you ever go out spend $25,000 to upgrade the steering wheel for your car?
It’s a silly question—unless you race IndyCars for a living. The intense competition and specialization of IndyCar drivers has forced them to develop hardware and software that helps create custom workspaces. At the speed which IndyCar drivers operate, this customization minimizes the effort it takes to perform at world class levels.
Here’s a terrific video from IndyCar driver Ryan Hunter-Reay explaining the complexity of a modern IndyCar steering wheel:
With specialization comes optimization—and that’s what this Insight is about
Mixing Light (and its sister websites Tao Of Color and Colorist Flight School) are all about specializing within the field of digital post-production. And the ‘Desert Island Challenges’ are about helping editors fold color correction into a sub-specialty—within the confines of their editing systems.
DaVinci Resolve, SpeedGrade, Baselight are all about optimizing the color grading workspace
Their interfaces are designed around core color correction tasks, ideally placing the most useful tools (and feedback mechanisms) in the most logical places. It’s one reason why a professional colorist can ‘touch’ so many more shots in a single day then most editors can imagine—their workspaces are designed specifically for the task of color correction.
Guess what? Premiere Pro interface is optimized for editing, not color correction
And latest release of Creative Cloud 2015 proves it… the addition of a Workspaces Toolbar is your prime evidence that Adobe recognizes different tasks need different interface elements. It’s one of the keys to speeding up the task-oriented nature of non-linear editing. Some days you’re editing. Some days you’re mixing. Other days you’re doing graphics and titles. And sometimes you’ve got to focus your attention to color correction.
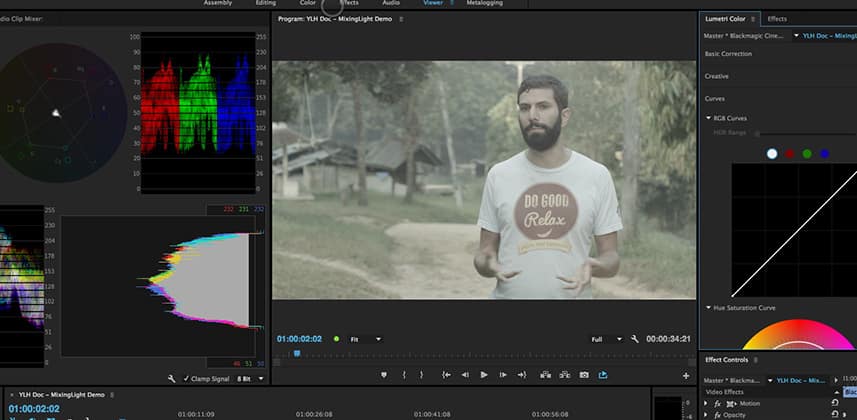
Premiere Pro CC 2015 introduced the Color Workspace, front and center

The Color workspace puts another optimization at the forefront of a color correction-optimized user interface: The Lumetri Panel (Robbie has an initial Insight on the Lumetri panel plus an Insight on working with LUTs in the Lumetri panel).
But in my experience, the default Color workspace isn’t quite the IndyCar steering wheel it could be
It’s a good step in the right direction but you can make a few optimizations to the default Color workspace to really speed up working while color correcting. Is it the same as color grading in SpeedGrade or Resolve? No. But with a few tweaks you should find yourself moving through your corrections much more fluidly, with an economy of effort.
This Insight will take you through setting up two Custom Workspaces, optimized for color correction
I’ll be using these two layouts for the rest of this Desert Island Challenge, so it’s worth taking you through it step-by-step. My hope? You’ll make these workspace tweaks yourself—and then come up with a few tweaks yourself and share those tweaks with the rest of the Mixing Light community!
Enjoy!
-pat
Member Content
Sorry... the rest of this content is for members only. You'll need to login or Join Now to continue (we hope you do!).
Need more information about our memberships? Click to learn more.
Membership optionsMember Login