Moving Looks from SpeedGrade CC to DaVinci Resolve
Mathieu Marano C.S.I.
[spacer height=”2em;”][infobox last_column=”true” closable=”false” color=”grey”]This is a guest blog post from Colorist Mathieu Marano. MixingLight has edited and adapted it to conform with our style. His original is on his website. You can visit Mathieu’s homepage and interact with him on Twitter. He also helps run a User Group in Montreal.[/infobox][spacer height=”2em;”]
Sharing Looks: From SpeedGrade CC to DaVinci Resolve
In a prior article, we looked at exporting a Look from DaVinci Resolve and importing it into SpeedGrade CC. In this second article, we’ll go the other way—exchanging a Look created in SpeedGrade CC and importing it into DaVinci Resolve.
SpeedGrade CC History Lesson
Before Adobe bought SpeedGrade, it was designed to work extremely well with other software and grading solutions—sharing the Looks it creates with other apps.
This functionality can from an app named SpeedGrade OnSet whose purpose was to create looks on set and eventually move them to the grading station or to the lab for dailies. The full version of SpeedGrade then inherited this ability to export a range LUT formats for import into a wide variety of color grading workstations. These types of LUTs are often called Look LUTs and are the key to moving your Look out of SpeedGrade CC to DaVinci Resolve.
The Workflow
Creating the Grade
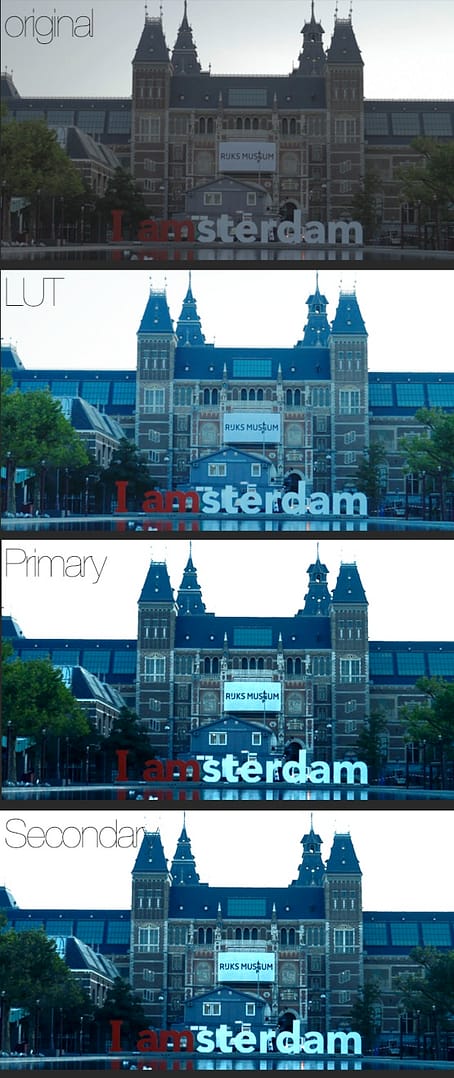
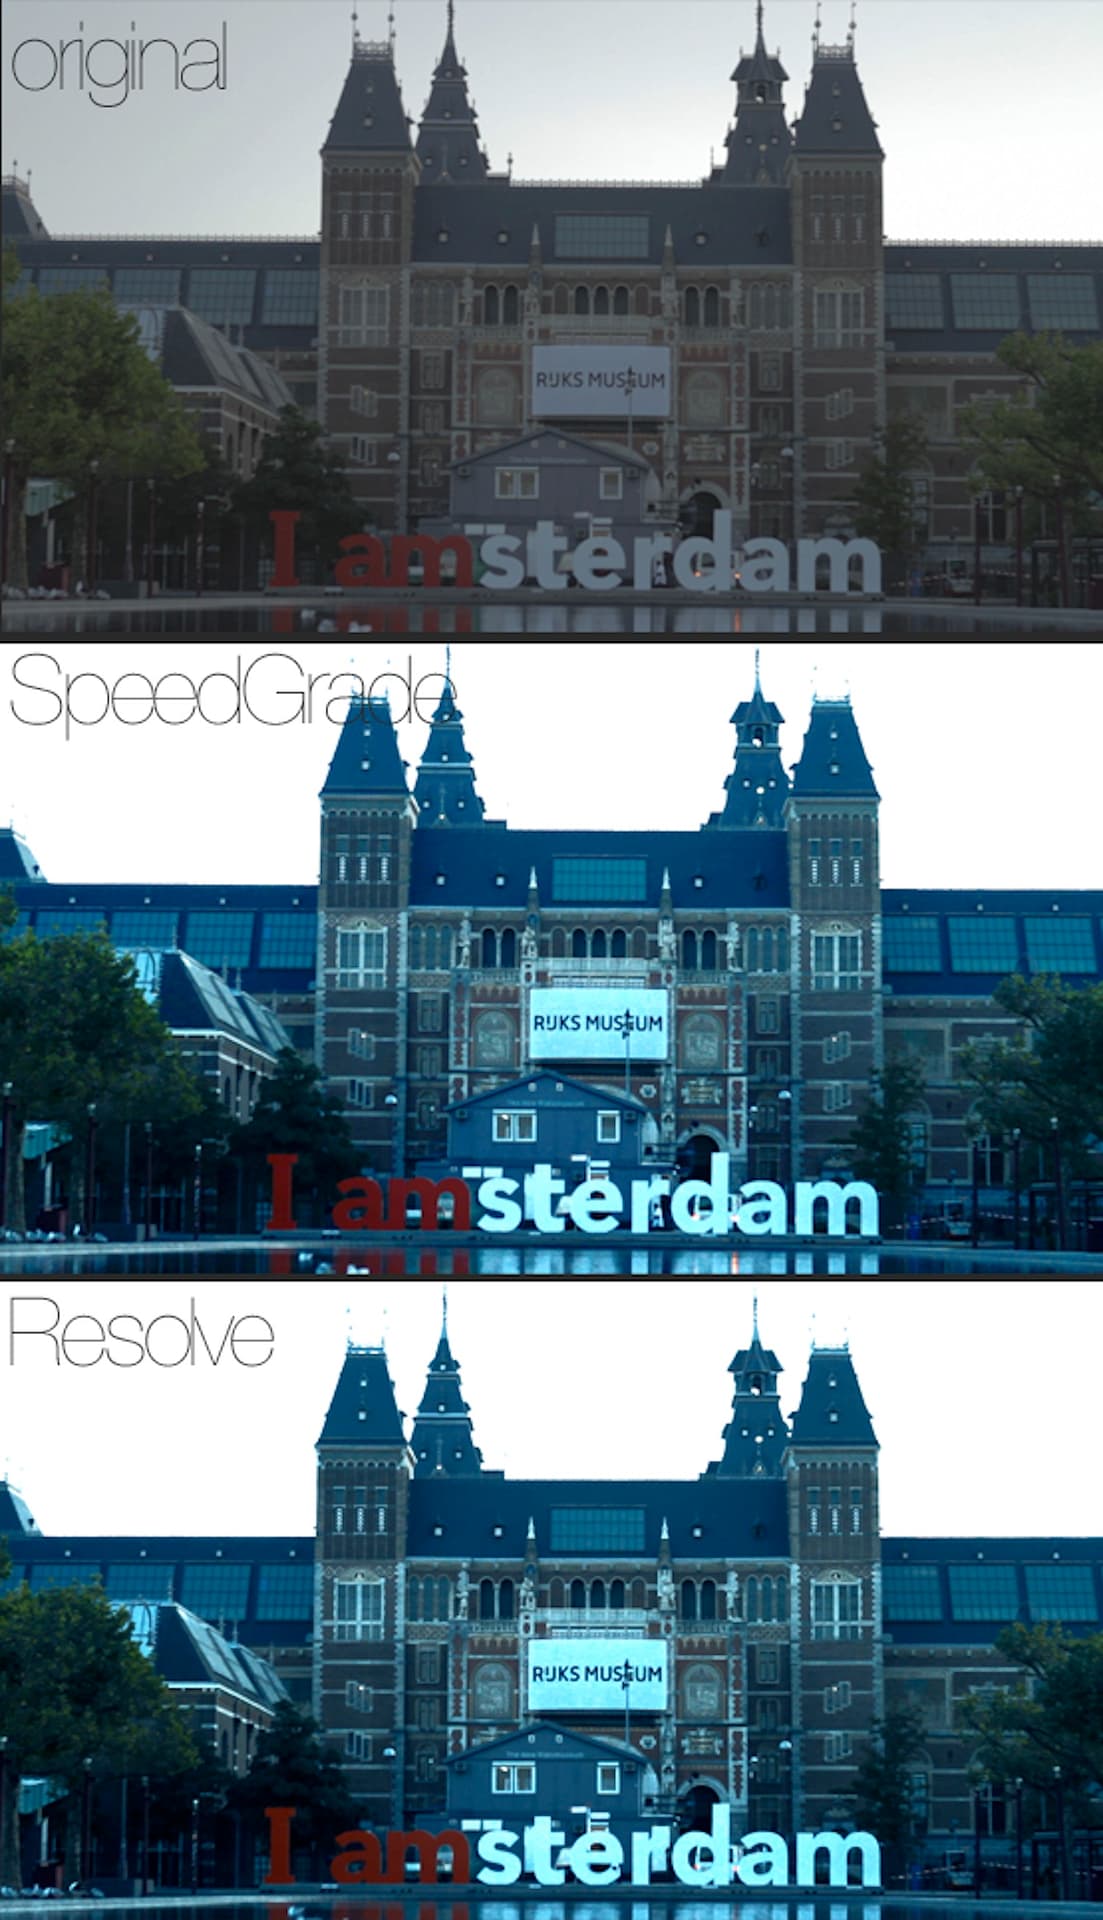
First, we have to open a SpeedGrade project and create a look. For this look I have one grading stack containing three layers.
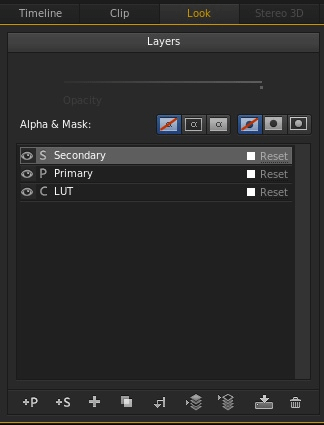
- Layer 1: A LUT called BLUE ICE created by LookLabs
- Layer 2: A Primary to give a bit more crunch in the highlights
- Layer 3: A Secondary to remove most of the green in the trees
Each look layer applied to the original:
Preparing for Export
Now that we have our look, there are two things we want to do:
- Save off the Look in SpeedGrade’s .Look file format
- Export this Look as a LUT that can imported into DaVinci Resolve
To do that I’m going to create two folders on my hard drive (this has to be done outside of SpeedGrade – a limitation of its User Interface).
- We’ll create a “SpeedGrade_looks” folder
- We’ll create a “SpeedGrade_LUT” folder
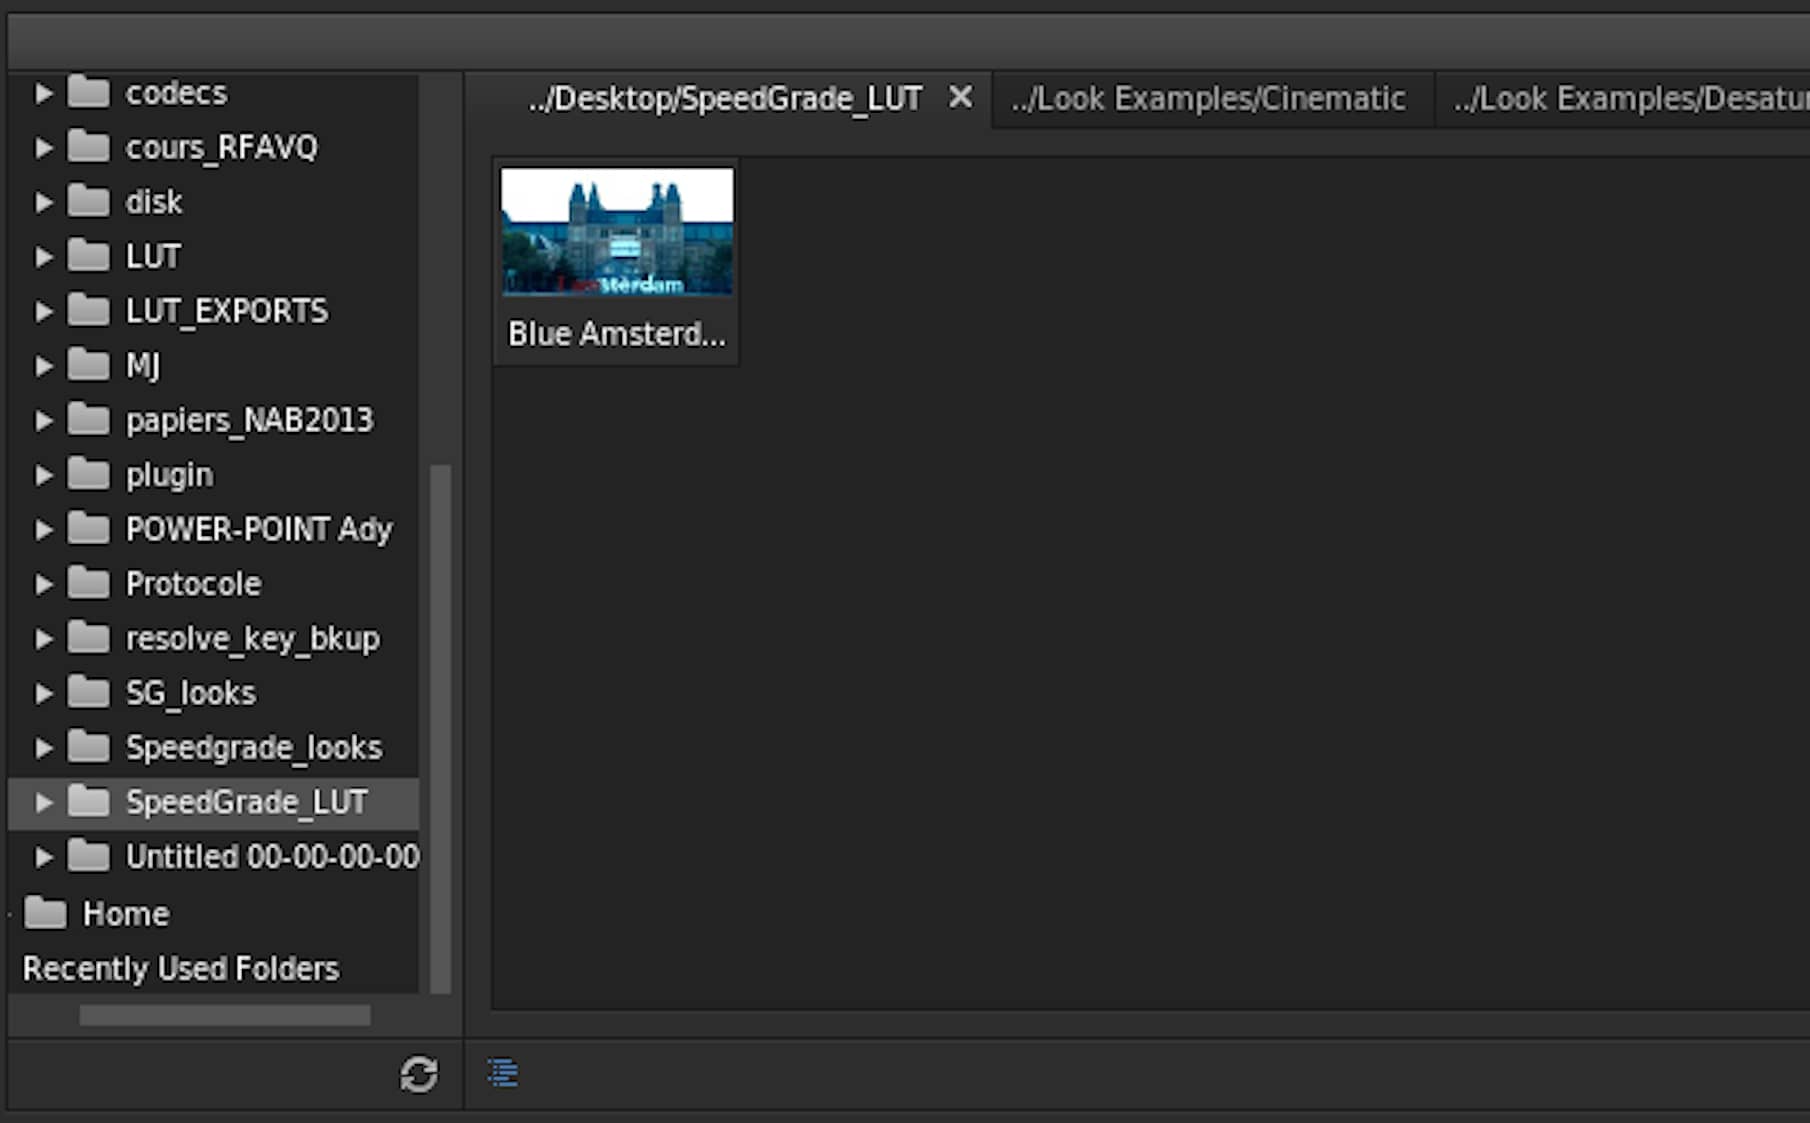
Back in SpeedGrade, in the Look tab, type CTRL+L to call the Look Management window. You’ll see a small disk browser on the left and a series of tabs next to it. Select the first tab and use to browser (called the tree control) to navigate to the “SpeedGrade_looks” folder you just created. If you don’t see it click the circling arrows at the bottom under the tree control to refresh the folders.
Once selected you should see the name of the folder in the tab name:
Save the .Look file
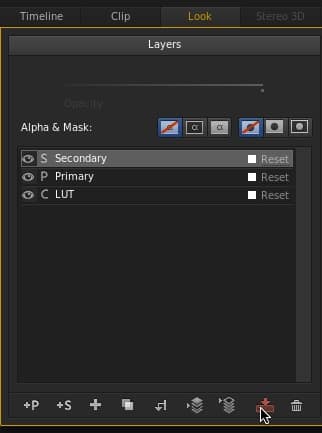
Make sure your clip is selected in the timeline and that you see the 3 layers of your stack in the Layers window. Then:
- Click the button representing an arrow pointing down on a disk called Save .Look.
- After saving, a thumbnail will appear in the Look Management tab.
- Double-click the label to rename the thumbnail. I’ll call mine “Blue Amsterdam”.
Elements of a .Look file
Go back to the ‘SpeedGrade_looks’ folder you created on your hard drive and you’ll see that SpeedGrade created two files: a .look containing the color grading information and a JPEG thumbnail.
These files combine to create the .Look file you see in SpeedGrade. They are now available for every SpeedGrade session on your workstation—by simply navigating to this folder. You’ll be able to reload these look on other shots and re-use them on other jobs. You can also access them from Premiere CC and Photoshop.
But you still can’t open them in Resolve.
Exporting a Look LUT for Resolve… and everybody else
To export this look to Resolve we have to create a LUT from it.
To do so:
- Right-click the .look thumbnail in the Look Manager and select Export Look.
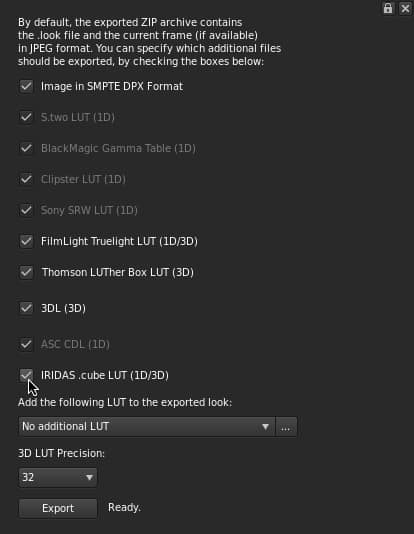
A new window opens, giving you a very complete list of different types of Lookup Tables to choose. You just have to select the correct checkbox for you grading workstation.
Where’s the Resolve export option?
Obviously missing is a ‘Resolve’ export option. To export a LUT for Resolve:
- Select Iridas .cube LUT (1D/3D)
- AND select the 3D LUT precision option to 32bit.
- Click the Export button.
Navigate to the folder we named “SpeedGrade_LUT”. SpeedGrade will then create all the LUTs you asked for and wrap them in a ZIP file.
Save your session and quit SpeedGrade.
Import a SpeedGrade LUT in Resolve
Next, in the “SpeedGrade_LUT” folder extract the files from the ZIP created by SpeedGrade.
Now, launch Resolve and open your project. Unlike SpeedGrade which will work with a LUT on anywhere on your hard drives, Resolve only reads LUTs placed in a specific folder. Luckily, it’s really easy to find that folder:
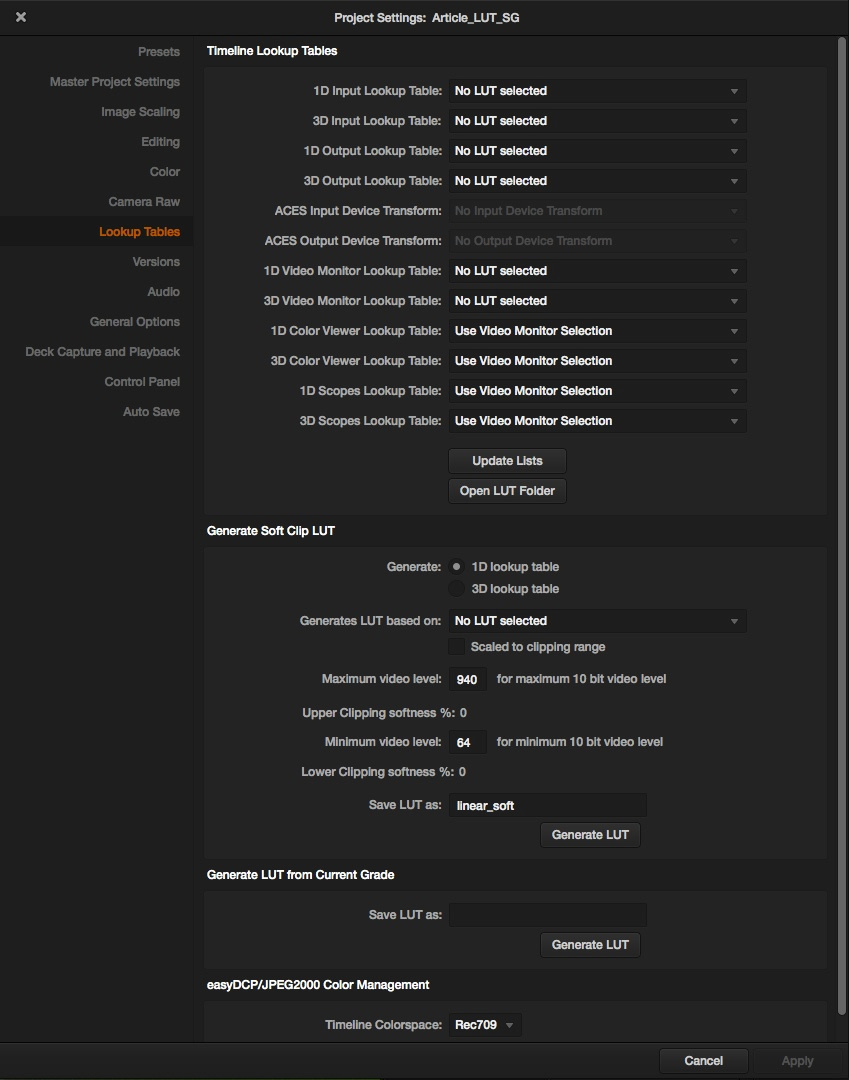
- Press the Gear button in the lower left of the interface to open the Project Settings panel
- Navigate to the Lookup Tables tab of the Project settings window
- Find the button: “Open LUT folder” and click on it
- Resolve will reveal its LUT folder on the desktop
You can also manually navigate to the folder here:
- Mac: Macintosh HD-> Library->Application Support-> Blackgic Design-> Davinci Resolve-> LUT
- Windows: C:ProgramData->Blackmagic Design->Davinci Resolve->Support->LUT
[spacer height=”2em”]
With Resolve’s LUT folder opened:
- Create a subfolder with the name of your project. I’ll call this one: Amsterdam_EP01
- Browse to our SpeedGrade_LUT folder
- Extracte the ZIP file
- Find the file with the .cube extension and copy it into the subfolder you created within Resolve’s LUT folder
- Go back to the Project Settings window in Resolve
- Click the Update Lists button in the Lookup Tables tab
Resolve will update its list of LUTs and you’re ready to for the final step!
Apply the Look LUT in Resolve
Alright – here we are, ready to actually apply the look we created in SpeedGrade inside DaVinci Resolve:
- Import your shot in Resolve
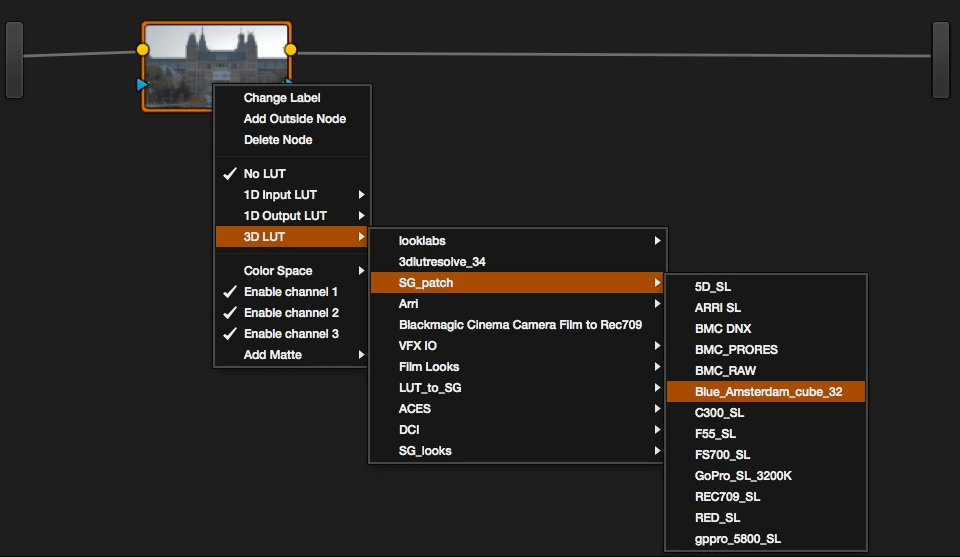
- Select it in the Color page and right-click on the associated node
- In the pop-up menu, mouse over 3D LUT
- This will reveal all the folders and top-level 3D LUTs in Resolve’s LUTs folder.
- Now hover over the folder you just created and navigate to the LUT we created in SpeedGrade
- Click on that LUT and it will be applied to your shot
Conclusion
This is the step-by-step method of saving off a SpeedGrade Look, exporting the Look as a LUT, importing it into Resolve and applying it to your shot. You can also use this method to export the various film stock LUTs that ship with SpeedGrade.
Got Questions?
Ask your questions or leave comments… and I’ll be happy to respond.
